By keyes | 29 November 2018 | 0 Comments
Best Practice for Soil Moisture Measurement
Introduction
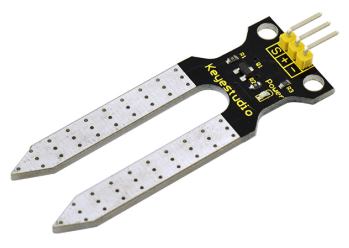
This is a simple soil moisture sensor aims to detect the soil humidity. If the soil is lack of water, sensor's analog value output will decrease, otherwise, it will increase.
If you use this sensor to make an automatic watering device, it can detect whether your botany is thirsty to prevent it from withering when you go out.
Using the sensor with Arduino controller makes your plant more comfortable and your garden smarter.
The soil moisture sensor module is not as complicated as you might think, and if you need to detect the soil in your project , it will be your best choice.

The sensor is set with two probes inserted into the soil, then with the current go through the soil, the sensor will get resistance value by reading the current changes between the two probes, and convert such resistance value into moisture content.
The higher moisture (less resistance), the higher conductivity the soil has.
The surface of the sensor have undergone metallization process to prolong its service life.
With the help of this sensor, the plant can remind of you: I need water.
If you use this sensor to make an automatic watering device, it can detect whether your botany is thirsty to prevent it from withering when you go out.
Using the sensor with Arduino controller makes your plant more comfortable and your garden smarter.
The soil moisture sensor module is not as complicated as you might think, and if you need to detect the soil in your project , it will be your best choice.

The sensor is set with two probes inserted into the soil, then with the current go through the soil, the sensor will get resistance value by reading the current changes between the two probes, and convert such resistance value into moisture content.
The higher moisture (less resistance), the higher conductivity the soil has.
The surface of the sensor have undergone metallization process to prolong its service life.
With the help of this sensor, the plant can remind of you: I need water.
How to test it ?
Step 1: Hardware Required
All of the parts for this project can be purchased directly from Keyestudio. UNO R3 + USB Cable
Soil Moisture Sensor
Jumper Dupont Wire
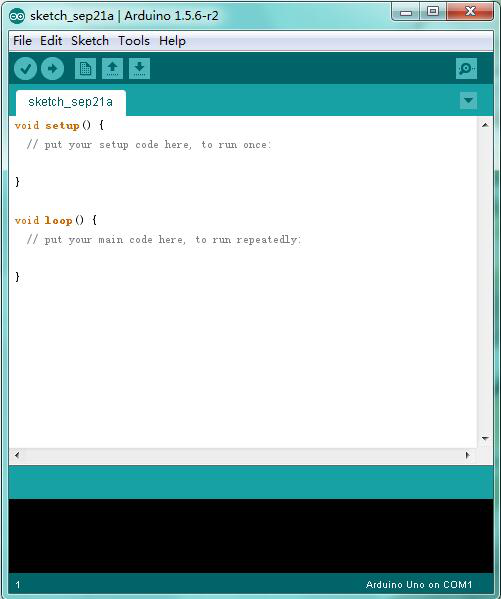
Step 2: Setup Arduino IDE

You can directly download the latest version at http://arduino.cc/en/Main/Software
Pls refer to the software download installation as below:
http://wiki.keyestudio.com/index.php/Download_Arduino_and_Install_Arduino_Driver
http://wiki.keyestudio.com/index.php/How_to_Install_Arduino_Library
Step 3: Hardware Wiring
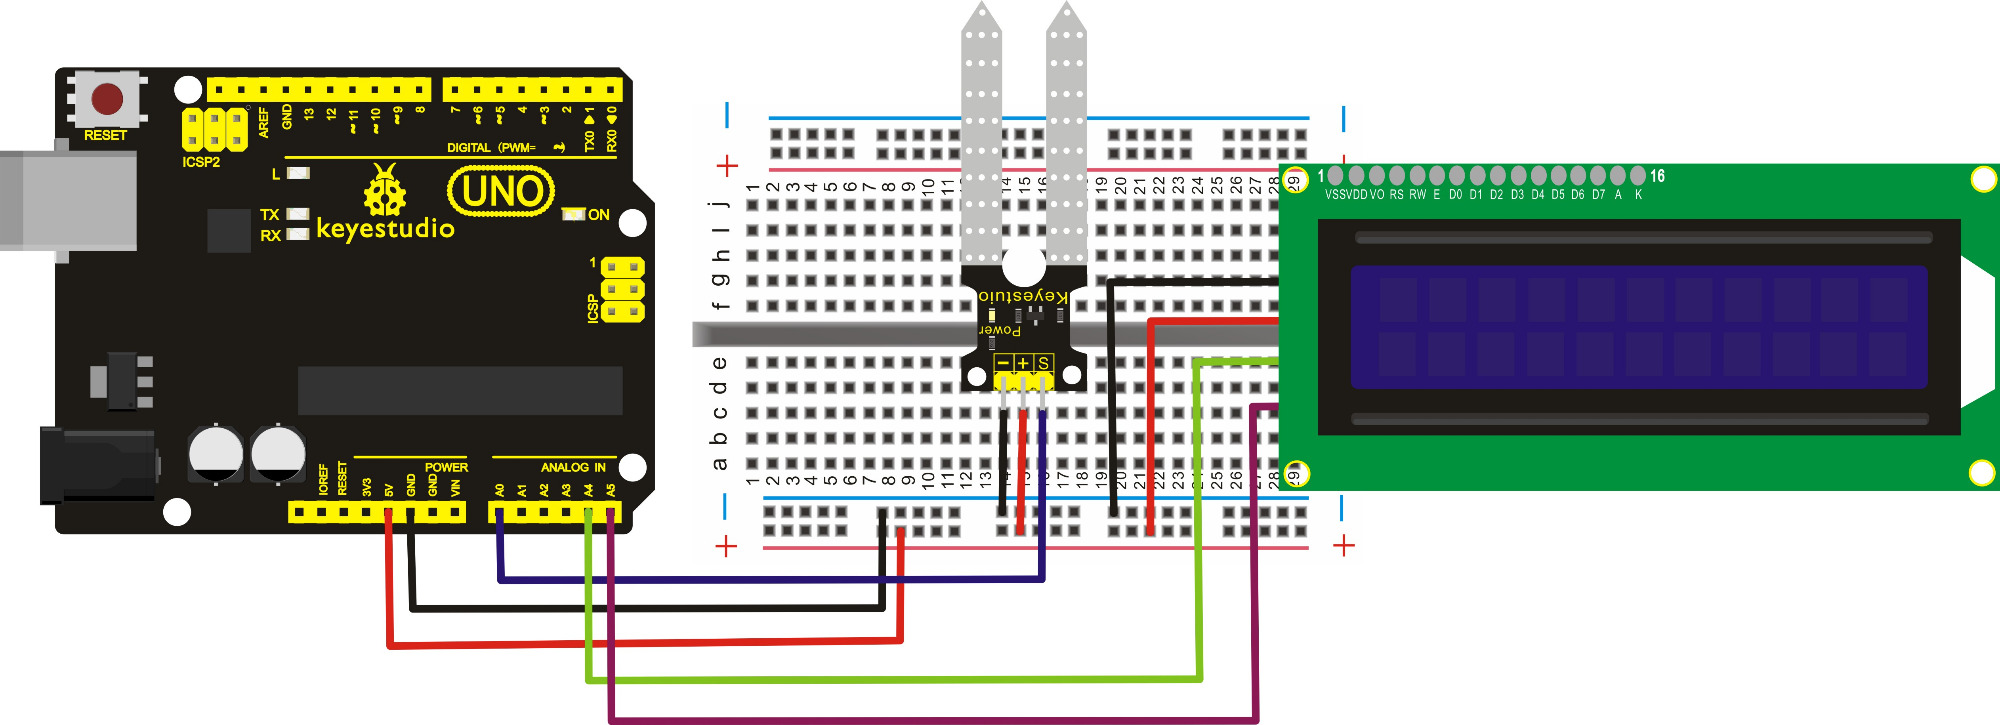
Connect the S pin of moisture sensor to A0 port, anode(+) pin to 5V port, cathode(-) pin to ground port (GND).
For 1602 LCD module, connecte the SDA pin to A4, SCL pin to A5, VCC pin to 5V, ground to ground.

Step 4: Sketch Code
Now it's time to get programming!
#include
#include
LiquidCrystal_I2C lcd(0x27,16,2); // set the LCD address to 0x27 for a 16 chars and 2 line display
void setup() {
lcd.init(); // initialize the lcd
lcd.init();
// Print a message to the LCD.
lcd.backlight();
lcd.setCursor(0,0);
lcd.print("Value:");
}
void loop() {
int sensorValue = analogRead(A0); // read A0 data and assign to sensorValue
if(sensorValue<10)
{
lcd.setCursor(6,0);
lcd.print(sensorValue);
lcd.setCursor(7,0);
lcd.print(" ");
}
if(sensorValue<100)
{
lcd.setCursor(6,0);
lcd.print(sensorValue);
lcd.setCursor(8,0);
lcd.print(" ");
}
if(sensorValue>99)
{
lcd.setCursor(6,0);
lcd.print(sensorValue);
}
if(sensorValue<301)
{
lcd.setCursor(0,1);
lcd.print("dry soil ");
}
if((sensorValue>300)&&(sensorValue<501))
{
lcd.setCursor(0,1);
lcd.print("humid soil ");
}
if(sensorValue>500)
{
lcd.setCursor(0,1);
lcd.print("in water ");
}
delay(200);
}
You can copy and paste the above code into Arduino IDE, then set the correct board and COM port. After compiling, upload the code to your board.
Step 5: Test Result
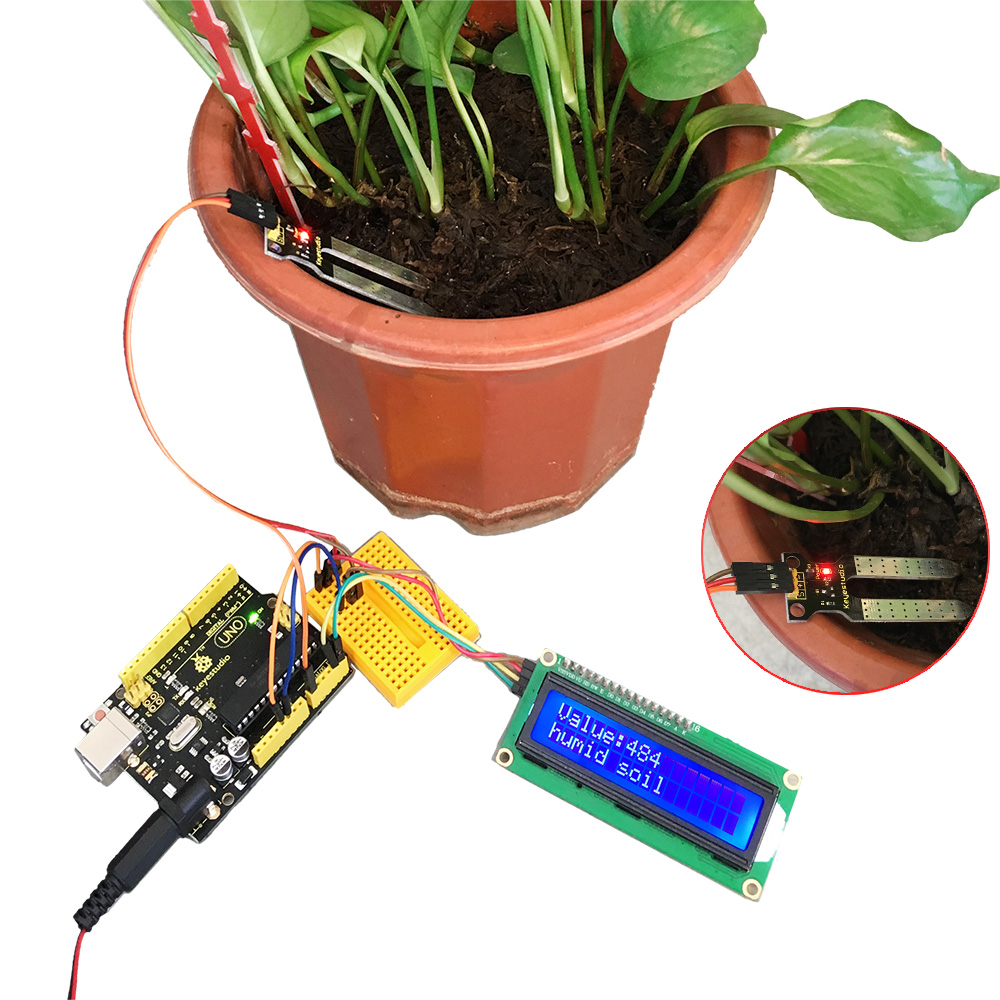
Done uploading, open the serial monitor, you can see the display value is 0, then place the sensing area of moisture sensor into the water, the value goes up.
You can program this sensor to be a switch for your watering device.

Everything is done so easy! Have your fun!
If you have any questions, please leave a comment below.
Leave a Reply
Your email address will not be published.Required fields are marked. *
CATEGORIES
TAGS